 |
| Using ink and sponges I added color to the embossed cards. The embossing folder is from Cuttlebug. |
 |
| Here I blended all the colors together. |
 |
| On this card I inked each thank you with it's own color. |
|
| Using ink and sponges I added color to the embossed cards. The embossing folder is from Cuttlebug. |
|
| Here I blended all the colors together. |
|
| On this card I inked each thank you with it's own color. |
 |
| The embossing folder is from Cuttlebug. I sprayed some shimmer paint from SU onto the card to add sparkle. |
 |
| The stamp set is from CTMH from the Avonlea Workshop kit. |
 |
| I embossed the front of the card and then sanded the embossed area. I then stamped the sentiment. |
 |
On this card I added some distress Ink after I sanded it. |
 |
| The embossing folder is from Cuttlebug. |
 |
| The stamp set is from CTMH "Family Love" |
 |
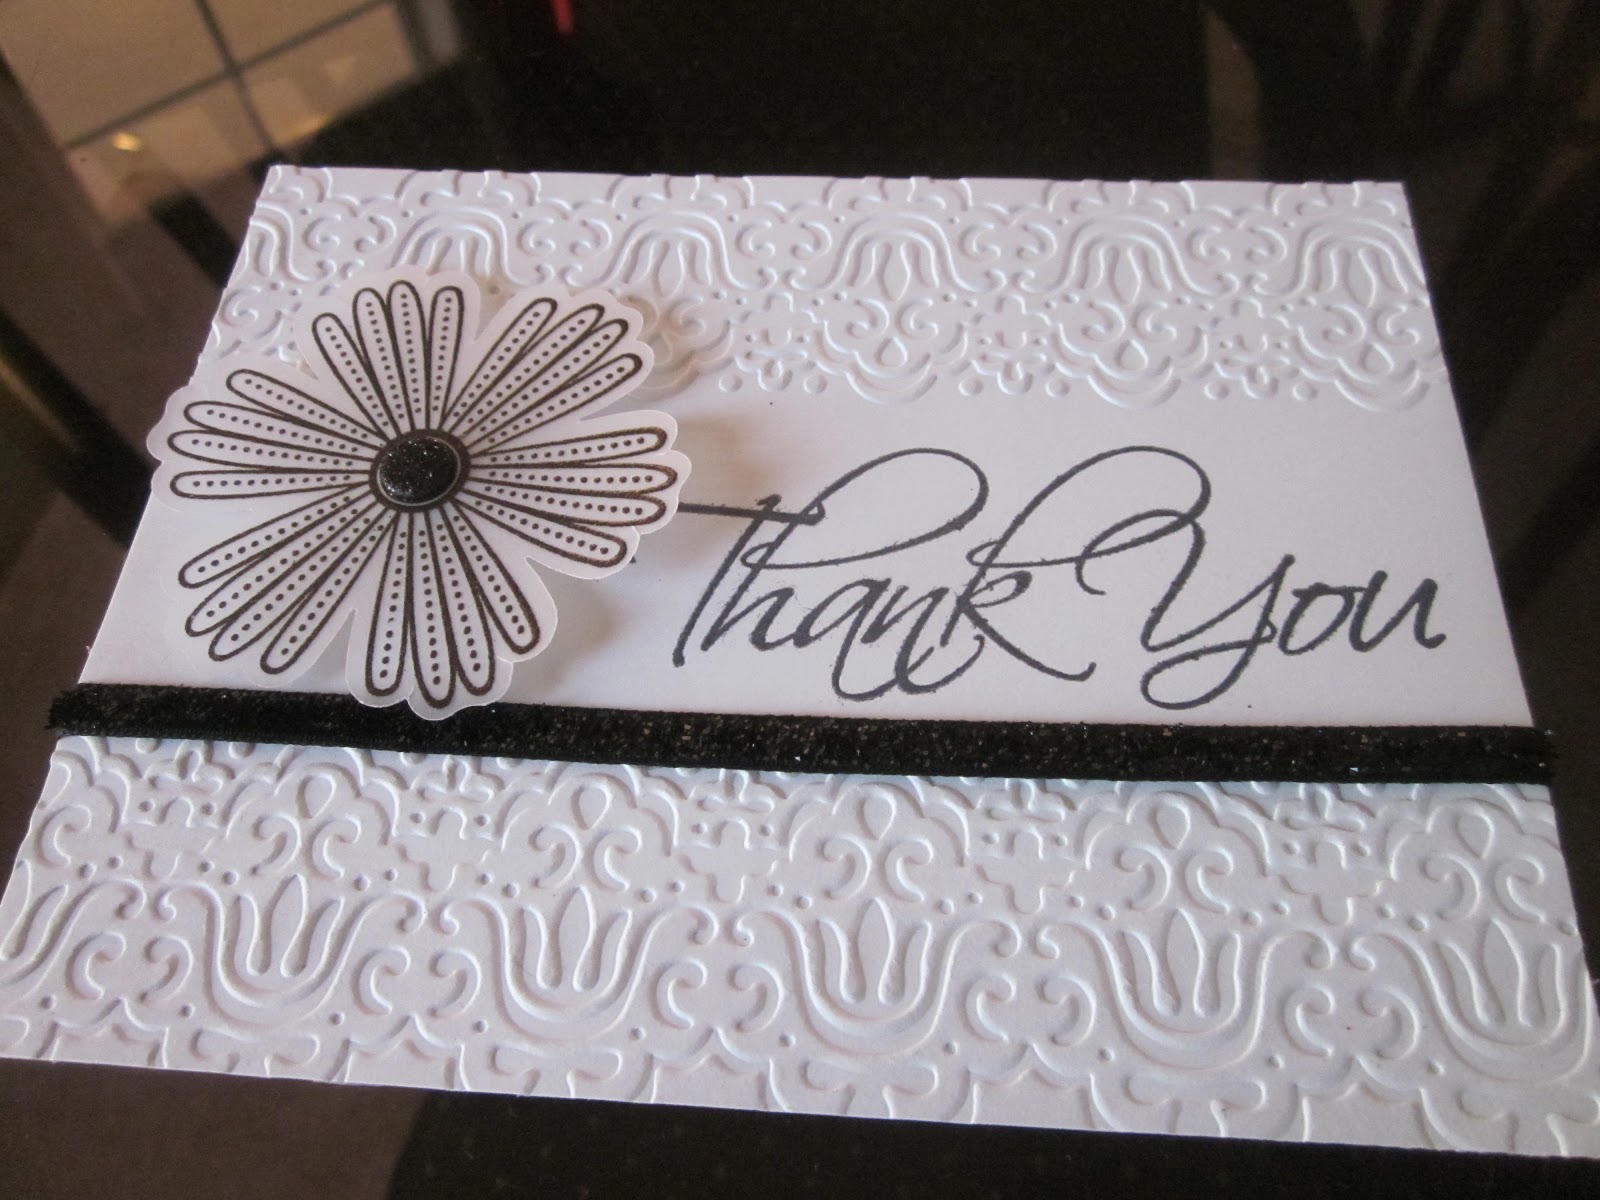
| The flower is stamped on Vellum and cut out. I embossed the card and stamped the "Thank You". I added some sparkle black ribbon |
 |
| Close up of the embossing. |
 |
| This candle was made using glitter ribbon and a poinsettia. |
 |
| Top of the jar. Made using gold and red paper and a rub-on. |

 |
| This jar I added glitter snowflake paper, penguins and snowflakes. |

 |
| Top of the jar has glitter paper and a penguin. |
 |
| I covered this candle jar with CTMH Pear & Partridge paper and attached the embellishments. |
 |
| The top of the lid has embellishments from SU |

 |
| This is a "Bag" card. It was made last year at a class given by my cousin Karen. |
 |
| The inside of the bag |
 |
| Close up of the stamped saying. |
 |
| This ornament was made using die cuts and alcohol inks. |
 |
| We used a shaker box window and painted the snow onto the window. |
 |
| We started with a white CS and created the green paper with the bird and branches. Gorgeous don't you think? |
 |
| This card was very simple but very elegant and fun to make. |
 |
| I used a punch to add a boarder on the bottom. Added some ribbon and string. Then attached a button |
 |
| I wish the camera would have captured the color of the paper. It's a beautiful combination of greens. |
 |
| The paper is from CTMH Pear & Partridge paper packet. |
 |
| Here is a better look at the rhinestone word "Merry". This was in the clearance bin at Michael's. |
 |
| Inside of the card. |
 |
| I used Prismacolor pencils to color in the image. The snowflakes are metal stickers. My sister Renee found them at "Tuesday Morning" and they are great. This paper packet is so gorgeous. I will be sharing a lot of cards with this paper. |
 |
| It reads: SLOW DOWN you're getting too old! The paper is from CTMH. The stamp was a gift from Debbie. I think it's from Michaels. |
 |
| I used what I call "cheaters" (store bought embellishments) on all my tags today. |
 |
| The paper I used is from CTMH "Pear & Partridge". |
 |
| I got the embellishments from Micheal's clearance after the Holidays last year. Don't you just love this snowman? |
 |
| I used an embossing folder to add the snow like background. |
 |
| The tags were cut using the Cricut CTMH Art Philosophy cartridge. |


 |
| I used Prismacolor pencils to color the water and grass. The tree branches and leaves are S.U. and Unity stamp sets. The saying and the star are from CTMH. The holly leaves are plastic embellishments I found loose at the bottom of my Christmas box. LOL (not sure were they are from) The moose stamp is a wooden stamp from Coronado Island Stamping. |
 |
| I printed out the info for the party on the computer. I stamped the balloons and colored them in. Stamped the blue circle background and the yellow candle flame. I stamped the "AARP" on CS, cut it out and inked it to add color. I attached the candle and picture to the invitation. |
 |
| He is just the cutest First Grader ever without teeth.... |
 |
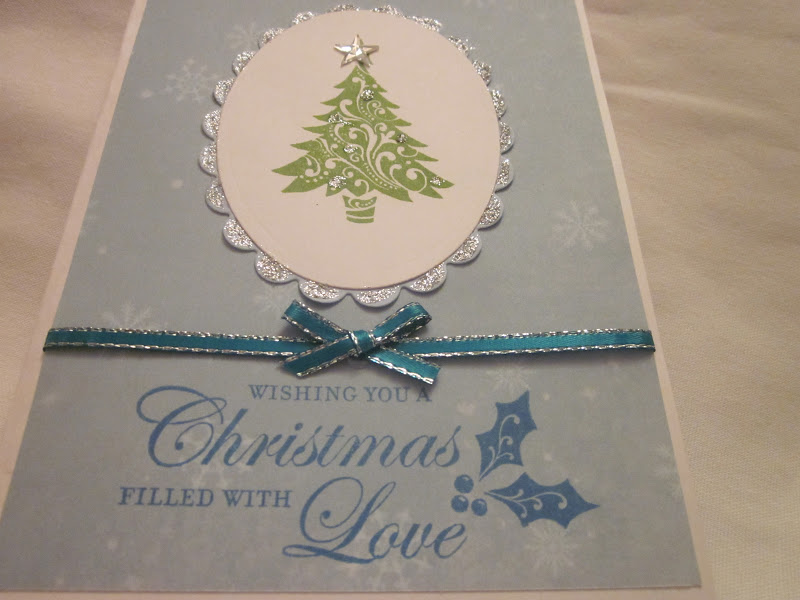
| I used die cuts to cut out the ovals. Stamped the tree and added glitter to the oval. Attached the ribbon and stamped the Christmas love Sentiment. |
 |
| This is a wonderful stamp set for Christmas. |
 |
| The white paper was already embossed with the stars. I stamped blue stars and saying with CTMH "Wishing Star" stamp set. I cut out the stars and attached them with foam adhesive. |
 |
| The red stars on the left were embossed using the Cuttlebug embossing border folders. The are about one inch wide and you can put them anywhere on your paper. |
 |
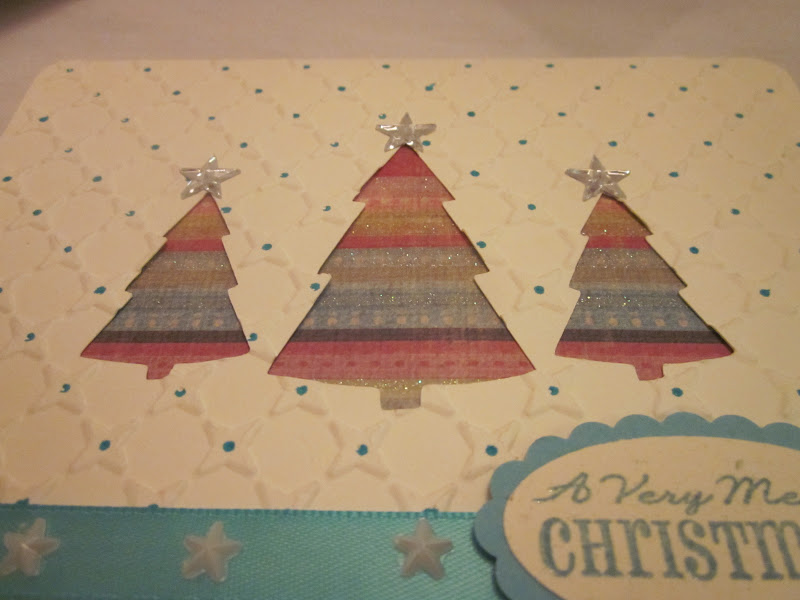
| Using the Cricut I cut out the cards and the three trees. I then took different embossing folders and embossed the front of the cards. I added paper to the back of the trees, then added ribbon and other embellishments. I touched up the cards with inks or markers to add some color. |
 |
| This paper is just gorgeous for these trees. |
 |
| I added dots with a marker on this card to give it some color. |
 |
| This paper is all glitter. The camera didn't pick it up but it sure does sparkle! |
 |
| Using the Cricut, I cutout a decorative layer of green CS, then attached it behind the trees with double adhesive and sprinkled it with Glitter. |
